
 English
 Deutsch
 italiano
 中文简体
中文简体
Author: Admin Date: 2025-06-19
Safety features related to reclining chair motors?
Is your favorite power recliner suddenly stuck, moving sluggishly, or making strange noises? Don't despair! A malfunctioning motor is a common issue, but often, it's a problem you can diagnose and even fix yourself. This comprehensive guide will walk you through everything you need to know about your recliner's motor, from understanding its basics to troubleshooting common problems and even replacing it, saving you time and potentially costly repair bills.
1. Understanding Recliner Motors
Before diving into troubleshooting or replacement, it's essential to understand what a recliner motor is, the different types you might encounter, and the basic components that make your power recliner move.
1.1 What is a Recliner Motor?
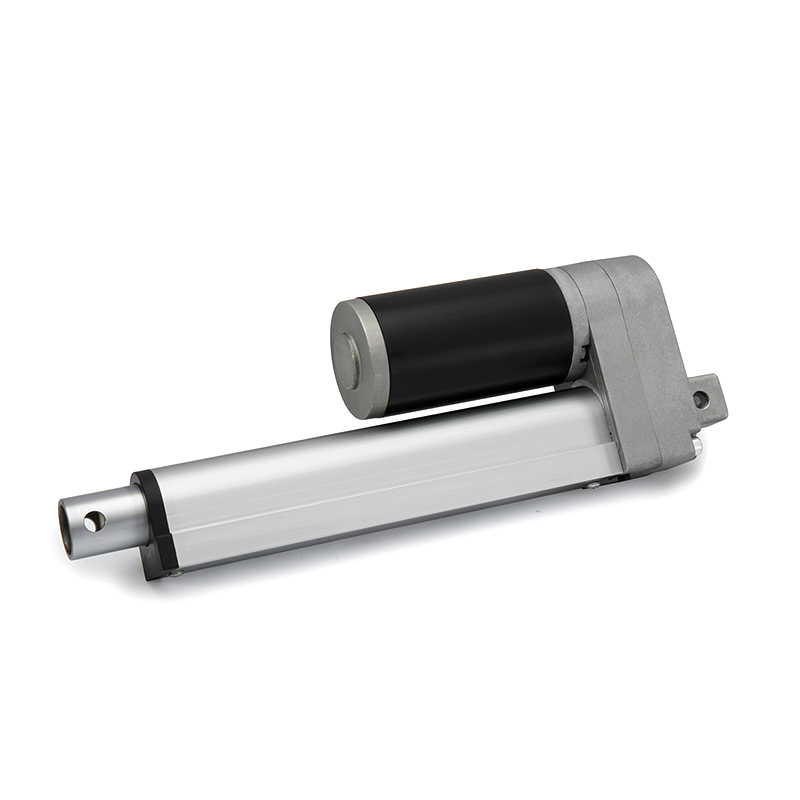
At its core, a recliner motor is the electromechanical heart of any power recliner or lift chair. It's typically a linear actuator, a device that converts rotational motion from an electric motor into linear (straight-line) push-and-pull motion. This linear motion is then used to manipulate the complex mechanism of the chair, allowing it to recline, elevate the footrest, or even lift the entire chair (in the case of lift chairs).
Think of it like this: when you press a button on your remote, the motor receives an electrical signal, causing a threaded rod inside the actuator to extend or retract. This rod is connected to the recliner's frame and linkages, translating that simple push or pull into the smooth reclining motion you expect. Without a functioning motor, your power recliner is just a static chair.
1.2 Types of Recliner Motors
While the fundamental principle remains the same, recliner motors are primarily categorized by the type of chair they power and the number of motors involved:
Power Recliner Motors: These are found in standard power recliners. A single motor system typically controls both the recline of the backrest and the extension of the footrest simultaneously. More advanced or larger power recliners might utilize dual motors, allowing independent control of the backrest and footrest for greater customization of seating positions. The motor mechanism is usually compact and integrated directly into the chair's frame.
Lift Chair Motors (Actuators): Lift chairs, designed for individuals with mobility challenges, require more robust motors. These are often larger, more powerful linear actuators capable of not only reclining the chair but also tilting the entire chair forward to assist the user in standing up. Lift chairs frequently employ dual motors, with one dedicated to the recline function and another specifically for the lift mechanism. Their design emphasizes strength and smooth, controlled movement for user safety.
Regardless of the specific type, these motors are built to withstand repeated use, though like any mechanical component, they can wear out over time.
1.3 Basic Components of a Recliner Motor System
A complete recliner motor system isn't just the motor itself; it's an interconnected network of components that work in harmony:
The Motor (Actuator): As discussed, this is the core component responsible for converting electrical energy into mechanical movement. It houses the motor, gears, and the linear push/pull rod.
The Transformer (Power Supply): This is the external block that plugs into your wall outlet. Its crucial role is to convert the high voltage AC (Alternating Current) from your home's electrical system (e.g., 120V in the US) into a lower, safer DC (Direct Current) voltage (typically 24V or 29V) that the recliner motor operates on. A faulty transformer is a common culprit for a non-responsive recliner.
The Remote Control (Hand Control/Switch): This is your interface with the recliner. Whether it's a wired hand control with buttons or a touch-sensitive panel on the side of the chair, it sends electrical signals to the control box (often integrated with the motor or transformer) to tell the motor when and how to move.
Wiring/Cables: A network of cables connects the transformer to the motor, the motor to the remote control, and sometimes the motor to other sensors or switches within the chair. These cables transmit power and control signals.
Control Box (Optional/Integrated): In some systems, there's a separate control box that acts as the central brain, receiving signals from the remote and directing power to the motor. In many modern designs, this control functionality is integrated directly into the motor unit or the transformer.
Understanding these basic components will be crucial when you begin to troubleshoot your recliner, as a problem in any one of them can prevent the entire system from functioning correctly.
2. Common Recliner Motor Problems
Even the most robust recliner motors can develop issues over time. Identifying the symptoms of a faulty motor and understanding the common causes of failure are the first steps toward diagnosing and ultimately resolving the problem.
2.1 Identifying Symptoms of a Faulty Motor
A failing recliner motor will often give you clear warning signs. Pay attention to these symptoms, as they can help pinpoint whether the motor itself is the issue or if another component in the system is at fault:
No Movement Whatsoever: This is the most obvious and frustrating symptom. You press the button, but nothing happens. The chair remains completely static. This could indicate a total motor failure, a power supply issue (transformer), a faulty remote, or a break in the wiring.
Jerky, Erratic, or Incomplete Motion: Instead of a smooth recline, the chair moves in fits and starts, or it stops mid-way through its cycle. This often suggests the motor is struggling to receive consistent power, has internal wear, or is encountering resistance in the chair's mechanism.
Unusual Noises (Grinding, Clicking, Whining): While recliners aren't completely silent, new or excessive noises are a red flag.
Grinding: Often points to worn gears inside the motor or the actuator assembly.
Clicking: Could be a relay attempting to engage but failing, or an issue with a limit switch.
Loud Whining: Might indicate the motor is straining, possibly due to a mechanical obstruction or internal friction.
Humming without Movement: This suggests the motor is receiving power but is unable to turn, possibly due to a jammed mechanism or a seized motor.
Overheating/Burning Smell: If the motor housing feels excessively hot to the touch or you detect a burning smell, immediately disconnect power. This is a serious symptom indicating significant electrical overload or internal friction, and continuing to operate it poses a fire risk.
Sluggish or Slow Operation: The chair moves but at a noticeably slower pace than usual. This can indicate a weakening motor, a power supply issue (transformer not providing adequate voltage/current), or increased friction within the chair's mechanism.
Chair Only Moves in One Direction: The recliner might extend but won't retract, or vice versa. This often points to a problem with the remote control, a specific wire, a limit switch, or sometimes an internal motor fault affecting a particular direction of travel.
2.2 Common Causes of Motor Failure
Understanding why recliner motors fail can help you prevent future issues and guide your troubleshooting:
Overuse and Wear and Tear: Like any mechanical component with moving parts, recliner motors have a finite lifespan. Constant daily use, especially with heavier individuals, naturally leads to wear on internal gears, bearings, and brushes (in some motor types). This is the most common reason for eventual motor degradation.
Electrical Issues:
Power Surges: Sudden spikes in electrical voltage can damage the motor's sensitive internal electronics or the transformer.
Loose or Damaged Wiring: Frayed wires, loose connections, or wires getting pinched by the chair's mechanism can interrupt power supply to the motor.
Faulty Transformer: The transformer is responsible for providing the correct voltage and current. If it fails, the motor won't receive power or won't receive enough to operate correctly.
Faulty Remote Control/Hand Switch: A common point of failure. If the buttons or internal contacts wear out, the remote may not send the correct signals to the motor.
Mechanical Problems/Obstructions:
Binding Mechanism: If the recliner's metal mechanism (the frame, linkages, and springs) becomes stiff, bent, or obstructed, the motor has to work much harder to move the chair. This excessive strain can lead to premature motor failure due to overheating and increased wear.
Foreign Objects: Small objects like toys, coins, or even pet fur can get lodged in the recliner's moving parts, causing resistance and putting undue stress on the motor.
Lubrication Issues: Lack of proper lubrication on the chair's moving metal parts can increase friction, making the motor strain.
Overloading: Consistently exceeding the chair's weight capacity puts tremendous stress on the motor and the entire reclining mechanism, significantly shortening its lifespan.
Manufacturing Defects: While less common in reputable brands, a manufacturing defect can lead to premature failure even in new chairs.
By carefully observing the symptoms and considering these common causes, you'll be better equipped to diagnose the specific problem with your recliner motor system before attempting any repairs.
Alright, with the symptoms and causes of motor problems covered, the next logical step in your comprehensive guide is "Troubleshooting Your Recliner Motor." This is where the practical diagnostic steps come in.
Here's the next section for your article:
3. Troubleshooting Your Recliner Motor
Before you even think about ordering a new motor, it's crucial to systematically troubleshoot your existing setup. Many common issues can be resolved without replacing the motor itself, saving you time, effort, and money. This section will guide you through a logical series of checks to pinpoint the problem.
Safety First: Always unplug your recliner from the wall outlet before performing any inspection or attempting to access components. This prevents accidental operation and reduces the risk of electrical shock.
3.1 Preliminary Checks
Start with the simplest and most common potential culprits.
Power Supply Check:
1.Is it Plugged In? This sounds obvious, but ensure the recliner's power cord is securely plugged into a working wall outlet.
2.Test the Outlet: Plug another small appliance (like a lamp or phone charger) into the same wall outlet to confirm it has power. If the outlet is dead, check your home's circuit breaker or fuse box.
3.Examine the Power Cord: Visually inspect the entire length of the recliner's power cord for any visible damage, cuts, or pinches.
Remote Control (Hand Control) Check:
1.Check Connections: Ensure the cable from the remote control is securely plugged into the chair's motor or control box. Unplug and re-plug it to ensure a solid connection.
2.Look for Damage: Inspect the remote's cable for any cuts or signs of wear. If the remote itself has visible damage, cracked casing, or sticky buttons, it might be the problem.
3.Listen for Clicks (if applicable): Some remotes or control boxes will make a faint clicking sound when a button is pressed, indicating that a signal is being sent. If you hear no click, the remote might be faulty.
Wiring Inspection:
1.Visual Scan: Carefully inspect all visible wiring underneath the recliner. Look for any loose connections, crimped wires, frayed insulation, or wires that have become disconnected.
2.Route Clearances: Ensure no wires are tangled around the chair's moving mechanism. When the chair reclines, it creates pinch points that can sever or damage wires.
3.Secure Connections: Gently push on all connectors to ensure they are fully seated. Sometimes, a connector can become partially dislodged with movement.
3.2 Testing the Motor with a Multimeter
If the preliminary checks don't reveal an obvious issue, a multimeter is an invaluable tool for diagnosing electrical problems. This step requires some basic understanding of electrical testing.
Access the Motor and Wiring: Carefully tip the recliner onto its front or side to gain access to the motor and its connections. You'll typically see wires coming from the transformer connecting to the motor, and another wire from the motor going to the hand control.
Test Power from the Transformer to the Motor:
1.Unplug the recliner.
2.Locate the connection point where the transformer cable plugs into the motor or a control box. Disconnect this plug.
3.Set your multimeter to measure DC Volts (VDC) and select a range appropriate for your transformer's output (usually 24V or 29V).
4.Plug the recliner's power cord back into the wall outlet.
5.Carefully place the red probe of the multimeter into one terminal of the transformer's output plug and the black probe into the other.
6.Expected Reading: You should get a reading very close to the transformer's stated output voltage (e.g., 24V or 29V).
7.Interpretation:
No Voltage (0V) or Very Low Voltage: The transformer is likely faulty and needs replacement.
Correct Voltage: The transformer is providing power correctly, and the issue lies elsewhere (motor, remote, or wiring).
Test for Continuity of Wires (Advanced):
1.Unplug the recliner completely.
2.Set your multimeter to the continuity setting (often indicated by a speaker icon, it beeps if there's a continuous circuit).
3.You can use this to check the integrity of individual wires. For example, if you suspect a remote control cable is cut, you can probe one end of a wire at the remote connector and the other end at the motor connector. A beep indicates a good connection. This is more complex and might require a wiring diagram.
3.3 Identifying Issues with the Transformer
The transformer is a common failure point because it's constantly converting power and can be subject to external factors like drops or overheating.
No Indicator Light: Many transformers have an LED indicator light. If this light is off when plugged into a live outlet, it's a strong indication the transformer is dead.
Audible Buzzing/Humming: A transformer that hums loudly or buzzes unusually might be struggling or failing.
Heat: While transformers can get warm, excessive heat or a burning smell indicates a serious internal problem.
Visual Damage: Look for cracks, bulges, or melted plastic on the transformer's casing.
Voltage Test (as described in 3.2): This is the most definitive test. If it doesn't output the correct voltage, it's faulty.
3.4 Checking the Hand Control
The hand control (remote) is another frequent point of failure due to constant handling and button pressing.
Listen for Relay Clicks: In many systems, pressing a button on the hand control sends a signal to a relay in the control box (or integrated into the motor) which then clicks to engage the motor. If you press a button and hear no click (assuming you've confirmed the transformer is supplying power), the hand control might not be sending the signal.
Button Response: Do the buttons feel "mushy" or stuck? Are they physically damaged?
Swap with a Known Good Remote (if possible): If you have access to another compatible recliner or a spare remote, swapping them out is the quickest way to confirm if the remote is the problem.
Visual Inspection of Cable: As mentioned in preliminary checks, thoroughly examine the remote's cable for cuts or fraying.
By systematically working through these troubleshooting steps, you'll likely narrow down the source of your recliner's problem to the transformer, the hand control, the wiring, or finally, the motor itself. If all other components test as good, then it's highly probable the motor is the culprit, and you'll need to proceed to the next section: replacing the motor.
Great! You've gone through the basics of recliner motors and comprehensive troubleshooting. Now it's time to move on to the core of the repair: "Replacing Your Recliner Motor." This section will be a detailed, practical guide.
Here's the next part of your article:
4. Replacing Your Recliner Motor
If your troubleshooting confirmed that the motor itself is faulty, or if you've decided that a DIY replacement is the most cost-effective solution, this section will guide you through the process. While specific steps can vary slightly between recliner models, the general procedure remains consistent.
Crucial Safety Warning: Always, always, ALWAYS unplug the recliner from the wall outlet before beginning any work on the motor or its components. Moving parts and electrical current pose serious risks.
4.1 Tools and Materials Needed for Replacement
Before you start, gather these essential tools and materials:
Replacement Recliner Motor/Actuator: Ensure it's compatible with your chair (more on choosing the right motor in Section 5).
Wrenches or Sockets: Common sizes include 10mm, 13mm, 1/2 inch, or 7/16 inch, depending on the bolts used by your chair's manufacturer. A socket wrench with an extension can be very helpful.
Phillips Head Screwdriver: For removing any covers or securing wire clips.
Flathead Screwdriver (Optional): Can be useful for prying or disconnecting certain plugs.
Pliers (Optional): For stubborn pins or clips.
Zip Ties (Cable Ties): Essential for securing new wiring and keeping it away from moving parts.
Marker or Camera: To mark connections or take photos before disconnecting anything, aiding reassembly.
Gloves: For hand protection.
Drop Cloth or Old Blanket: To protect your floor and the chair.
Assistant (Recommended): Recliners, especially lift chairs, can be heavy and awkward to maneuver. An extra set of hands will make the process much safer and easier.
4.2 Step-by-Step Guide to Replacing the Motor
Follow these steps carefully. Taking your time will prevent errors and ensure a successful replacement.
1.
Prepare the Workspace:
2.
Clear an area large enough to safely work around and under the recliner.
Lay down a drop cloth or blanket to protect your floor.
Unplug the recliner from the wall outlet. Confirm there is no power.
3.
Position the Recliner for Access:
4.
With the help of your assistant, carefully tip the recliner onto its back or side. This will expose the underside, where the motor and its connections are located. Ensure the chair is stable and won't tip over while you're working. Some chairs might have a "kickstand" to hold them up.
5.
Locate and Observe the Existing Motor:
6.
Identify the linear actuator (the motor) which will be attached to the chair's metal frame at two pivot points (usually one at each end).
Note how the wires are routed and secured. Take photos or draw a diagram if needed – this will be invaluable during reassembly.
Observe which pin connects to the chair's main lifting mechanism (often a "block" or "slide" on the footrest assembly) and which connects to the stationary frame.
7.
Disconnect the Wiring:
8.
Locate the main power cable connection to the motor (often a two-pin flat connector or a larger circular "DIN" plug). Disconnect it.
Locate the hand control cable connection to the motor (often a five-pin circular connector). Disconnect it.
Carefully snip any zip ties that secure these wires to the chair's frame. Remember their original path.
9.
Remove the Old Motor:
10.
The motor is typically secured by a bolt and nut (or a pin and cotter/retaining clip) at each end, attaching it to the chair's metal frame and the reclining mechanism.
Start with the pin/bolt connecting the motor to the moving part of the mechanism (usually the footrest assembly). Remove the cotter pin or nut, then slide out the bolt/pin. You may need to slightly adjust the mechanism by hand (gently!) to relieve tension on the pin.
Next, remove the pin/bolt connecting the motor to the stationary frame of the chair. Again, remove the cotter pin or nut and slide out the bolt/pin.
Once both connection points are free, the old motor should be detachable from the chair. Carefully slide it out.
11.
Install the New Motor:
12.
Align the new motor in the same orientation as the old one.
Attach the end of the motor that connects to the stationary frame first. Insert the bolt/pin and secure it with the nut or cotter pin. Do not overtighten; it should pivot smoothly.
Next, attach the end of the motor to the moving part of the mechanism. You may need to gently extend or retract the motor's shaft slightly by hand (or temporarily connect the transformer and remote briefly to position it, then immediately unplug) to align the holes. Once aligned, insert the bolt/pin and secure it.
Ensure all bolts/pins are securely in place but allow for smooth pivot action.
4.3 Connecting the New Motor
With the new motor physically installed, it's time to reconnect the electrical components.
1.Connect the Power Cable: Plug the transformer's cable securely into the corresponding port on the new motor.
2.Connect the Hand Control Cable: Plug the remote control's cable firmly into its designated port on the motor.
3.Manage Wiring: Use new zip ties to secure all wires to the chair's frame, following the original routing. This is critical to prevent wires from getting caught, pinched, or severed by the moving mechanism when the chair operates. Ensure there's enough slack for movement but no excess dangling.
4.4 Testing the New Motor
Before fully reassembling your chair, it's vital to test the new motor's functionality.
1.Initial Power-Up:
Double-check that all connections are secure and wires are safely routed.
Carefully plug the recliner back into the wall outlet.
2.Test All Functions:
Using the hand control, slowly test all directions of movement (recline, return to upright, footrest up, footrest down).
Listen for any unusual noises (grinding, squeaking). A slight hum is normal.
Observe the movement for smoothness and completeness. Does it extend and retract fully?
Operate the chair through its full range of motion several times to ensure everything is working as expected.
3.Check for Pinch Points: While operating, visually inspect underneath the chair one last time to confirm no wires or fabric are being pinched or obstructed by the moving mechanism.
If the new motor operates smoothly and correctly, you can now carefully return the recliner to its normal position and enjoy your "newly" repaired chair! If you encounter issues during testing, re-check all connections and review the troubleshooting steps in Section 3.
You've done the hardest part – identifying the issue and performing the replacement! Now, it's crucial to equip your readers with the knowledge to select the correct replacement motor. This section will cover "Choosing the Right Replacement Motor."
Here's the next part of your article:
5. Choosing the Right Replacement Motor
Replacing a recliner motor isn't a "one size fits all" scenario. To ensure your new motor functions correctly and safely, you must select a compatible model. This requires careful attention to specifications, connection types, and sometimes, even the physical dimensions of the motor.
5.1 Understanding Motor Specifications
The most critical step in choosing a replacement motor is to match the specifications of your original unit. Finding the label on your old motor is paramount. This label, often a sticker, typically contains all the necessary information. Look for:
Model Number: This is the primary identifier. Brands like Okin, Limoss, Kaidi, and Mulin are common. The model number will be something like "JLDQ.11.156.333K," "KDPT007," or "ML8-233." This is your best starting point for finding an exact match or a compatible cross-reference.
Voltage (VDC): Most recliner motors operate on a low DC voltage, commonly 24V DC or 29V DC. It's crucial that your new motor matches this voltage, as using an incorrect voltage can damage the motor or the transformer. The input voltage is usually printed on the motor's label.
Amperage (Amps/A) or Current Draw: This indicates the power the motor consumes. While exact matching is ideal, a slightly higher amperage rating on a replacement motor is generally acceptable, as it simply means the motor can draw more current if needed, without necessarily doing so. However, never go for a motor with a significantly lower amperage rating than your original, as it might be underpowered for your chair.
Stroke Length: This refers to the linear distance the actuator rod travels from its fully retracted to its fully extended position. It's measured in millimeters (mm) or inches. A common stroke length might be 200mm (approximately 7.8 inches) to 350mm (approximately 13.7 inches). If your old motor's label is unreadable, you'll need to measure the stroke length manually by fully extending the rod and measuring the exposed length, then retracting it and measuring the exposed length, and calculating the difference, or measuring the overall length when fully retracted and extended.
Minimum Install Dimension (Retracted Length): This is the length of the motor when its rod is fully retracted, measured from the center of the pivot pin at one end to the center of the pivot pin at the other end. This dimension is critical for ensuring the motor physically fits within the chair's mechanism when fully closed.
Connection Types:
Power Input: How does the transformer connect to the motor? Common types include a 2-pin flat round connector (one pin flat, one round) or a larger multi-pin DIN plug. Ensure the replacement motor has the identical power input connector.
Hand Control Input: How does the remote control connect to the motor? This is typically a 5-pin or sometimes a 7-pin circular DIN connector. Match the number of pins and the connector style exactly.
Motor-to-Chair Attachment Points: Most motors attach via clevis pins or bolts at each end. Verify that the new motor has compatible attachment points and that the distance between these points (when the motor is retracted and extended) matches your original.
What if the label is unreadable or missing? If you can't find or read the label, take clear photos of your existing motor from all angles, paying special attention to the connector types and how it's mounted. Measure the stroke length and the minimum install dimension (retracted length from pivot point to pivot point). Many online suppliers and furniture parts specialists can help you identify a compatible replacement based on these photos and measurements.
5.2 Where to Buy Replacement Motors
You have several options when sourcing a new recliner motor:
Online Retailers: Websites like Amazon, eBay, and specialized furniture parts websites (e.g., GreatFurnitureDeal.com, Recliner-Handles.com) are excellent resources. They offer a wide selection, competitive prices, and often detailed compatibility information. Be sure to check seller reviews and return policies.
Local Furniture Repair Shops: If you have a local furniture repair or upholstery shop, they may stock common motors or be able to order one for you. This can be beneficial for getting expert advice and potentially faster delivery.
Chair Manufacturer/Brand: If your recliner is from a well-known brand (e.g., La-Z-Boy, Ashley, Catnapper), you might be able to order directly from their parts department or an authorized dealer. This often guarantees compatibility but can sometimes be more expensive.
Used Parts/Salvage (Use with Caution): While options exist for used parts, buying a used motor carries risks regarding its remaining lifespan and hidden defects. It's generally recommended for very old or unique chairs where new parts are unavailable.
5.3 Top Recliner Motor Brands
Several manufacturers are recognized for producing reliable recliner motors (linear actuators). When searching for replacements, you'll frequently encounter these brands:
Okin (DewertOkin): A widely recognized and respected brand, often found in high-quality recliners and lift chairs. They produce a broad range of durable actuators.
Limoss: Another very common and reputable manufacturer of linear actuators for furniture.
Kaidi Electrical: A prominent Chinese manufacturer, their motors are widely used in a variety of power recliners.
Mulin Electric: Another common brand of linear actuators found in many power recliner models.
RMT (Remarkable Motor Technology): Often seen in various furniture applications.
While an exact brand match isn't always necessary (as long as the specifications and connections align), sticking with a recognized brand often assures quality and reliability for your replacement.
By meticulously comparing your old motor's specifications with potential replacements and choosing a reputable source, you'll significantly increase your chances of a successful and long-lasting repair.
Great work so far! You've covered the what, the how-to-fix, and the how-to-buy. Now, let's focus on proactive measures with "Maintaining Your Recliner Motor." This section will help your readers keep their recliners in top shape and prevent future issues.
Here's the next part of your article:
6. Maintaining Your Recliner Motor
Replacing a recliner motor can be an involved process, but with a few simple maintenance practices, you can significantly extend the life of your motor and the entire chair. Proactive care not only saves you from future headaches and expenses but also ensures your recliner remains a comfortable and reliable piece of furniture for years to come.
6.1 Tips for Extending Motor Life
The longevity of your recliner motor is heavily influenced by how it's used and maintained. Incorporate these habits to maximize its lifespan:
Respect Weight Limits: Every recliner has a maximum weight capacity specified by the manufacturer. Consistently exceeding this limit puts undue strain on the motor, the reclining mechanism, and the frame, leading to premature wear and potential failure. Always check your chair's manual for its specific weight rating.
Avoid Abrupt Movements: Don't "flop" into the recliner or slam the footrest down. Operate the remote control gently and allow the motor to move the chair smoothly and gradually. Jerky or forceful movements stress the gears and internal components of the motor.
Don't Over-Recline or Over-Lift: The built-in limit switches prevent the motor from over-extending or over-retracting. However, continuously holding the button down after the chair has reached its full range of motion can still put unnecessary strain on the motor. Release the button once the desired position is achieved.
Keep Pathways Clear: Ensure there are no obstructions (pets, toys, blankets, etc.) in the path of the footrest or reclining mechanism. If the motor encounters resistance, it can overheat and fail. Anti-pinch features offer protection, but preventing obstructions altogether is the best approach.
Use a Surge Protector: Power surges, even small ones, can degrade or instantly damage sensitive electronic components, including your recliner's transformer and motor. Plugging your recliner into a high-quality surge protector can shield it from these electrical spikes.
Moderate Usage (Where Possible): If your recliner is in constant use (e.g., in a busy family room or for someone who spends a lot of time in it), consider occasionally giving it a "rest." Continuous, heavy use will naturally lead to faster wear than intermittent use.
6.2 Regular Cleaning and Maintenance
Dust, dirt, and debris are silent enemies of mechanical parts. Regular cleaning, especially around the motor and mechanism, is crucial.
Vacuum Regularly: Use a vacuum cleaner with a brush or upholstery attachment to remove dust, pet hair, and crumbs from around the cushions, in crevices, and especially underneath the chair where the motor and mechanism reside. Dust accumulation on the motor can act as an insulator, causing it to run hotter and reducing its efficiency. Aim for at least a monthly vacuuming.
Wipe Down Exterior Components: Use a slightly damp cloth to wipe down the power cord, transformer, and hand control. Ensure these are completely dry before plugging anything back in. For electronic components, use a cleaner specifically designed for electronics.
Lubricate Moving Parts (Chair Mechanism, Not Motor): While the motor itself is a sealed unit and doesn't require internal lubrication, the chair's metal reclining mechanism (hinges, pivot points, connecting rods) benefits greatly from periodic lubrication. Use a silicone-based spray lubricant (avoid oil-based lubricants, which can attract dust and grime). Apply sparingly to all metal-to-metal contact points, then operate the chair a few times to distribute the lubricant. Never spray lubricant directly onto the motor or electrical components.
Check Wiring Routinely: During cleaning or lubrication, take a moment to inspect all cables and wiring underneath the chair. Look for any signs of fraying, cuts, loose connections, or wires that are too close to moving parts. Re-secure them with zip ties if necessary, ensuring they have enough slack but aren't dangling.
6.3 Avoiding Overloading the Recliner
Overloading doesn't just refer to exceeding weight limits; it also pertains to how the motor is used in specific situations.
Don't Use the Footrest as a Step: Never stand or sit on the extended footrest, and discourage children from doing so. This puts immense, unnatural pressure on the motor and the footrest's supporting mechanism, leading to bending, breaking, or motor failure.
Avoid Pushing the Recliner Manually While Motor is Engaged: If you're trying to adjust the chair, use the remote. Forcing the chair's movement against the motor's operation can strip gears or damage the internal mechanism.
Keep Children and Pets Clear: Always ensure children and pets are clear of the chair's moving parts when operating it. While modern recliners have anti-pinch features, prevention is always the best safety measure.
By integrating these maintenance tips into your routine, you can significantly extend the functional life of your recliner motor and enjoy your comfortable chair for many years without the need for frequent repairs.
7. Safety Precautions
Working with electrical components and heavy furniture always carries inherent risks. While modern recliners incorporate several built-in safety features, your adherence to proper safety precautions is paramount when troubleshooting, repairing, or replacing a recliner motor. Ignoring these guidelines can lead to electrical shock, personal injury, or damage to your chair.
7.1 Disconnecting Power Before Working on the Recliner
This cannot be stressed enough:
Always Unplug First: Before you touch any wiring, disconnect any plugs, or attempt to remove any components from your recliner, unplug the chair's power cord from the wall outlet. This is the single most important safety step you can take. It eliminates the risk of electrical shock and ensures no unexpected movements occur while you're handling the chair, which could cause injury.
Verify Disconnection: Do not rely solely on the chair being "off" or a power strip being switched off. A physical disconnection from the main power source by pulling the plug from the wall eliminates any doubt about residual power or accidental activation.
Consider a Battery Backup Disconnect: If your recliner, especially a lift chair, has a battery backup system (often a compartment for 9V batteries near the transformer), ensure those batteries are also disconnected or removed before working on the motor system. These batteries can still supply power for limited operations even if the chair is unplugged from the wall.
7.2 Using Proper Tools and Techniques
Using the right tools and employing correct techniques not only makes the job easier but also significantly reduces the risk of injury or damage.
Use Insulated Tools: Whenever possible, use tools with insulated handles, especially screwdrivers and pliers, to provide an extra layer of protection against electrical shock.
Wear Protective Gear: Gloves can protect your hands from pinches, scrapes, and sharp edges of the metal mechanism. Safety glasses are advisable to protect your eyes from any debris or unexpected movements that could occur during manipulation of the chair.
Proper Lifting Techniques: Recliners are heavy and awkward. If you need to tip the chair, always do so with assistance from another person. Lift with your legs, not your back, to prevent strains or injuries. Ensure the chair is stable and secure in its tipped position before working underneath it. A poorly balanced chair could fall, causing significant injury or damage.
Avoid Forcing Components: If a bolt, pin, or connector is stuck, don't force it with excessive leverage. Forcing can strip screws, bend components, or cause sudden slips that lead to injury. Instead, apply penetrating oil if a bolt is seized, or re-evaluate the connection if a plug is difficult to remove. Often, a gentle wiggle or specific angle of pull is all that's needed.
Secure All Fasteners: When reassembling, ensure all bolts, nuts, and pins are securely fastened. Loose components can lead to unstable operation, increased wear on the mechanism, and potential mechanical failure or injury during subsequent use. Do not overtighten, but ensure they are snug and cannot vibrate loose.
7.3 Seeking Professional Help When Needed
While this guide aims to empower you with the knowledge for DIY repair, there are times when calling in a professional is the safest and most sensible option.
Uncertainty or Lack of Experience: If you are unsure about any step, uncomfortable with electrical work, or lack the necessary tools (such as a multimeter for testing), it's always better to consult a qualified furniture repair technician or an electrician. Attempting repairs beyond your skill level can exacerbate the problem or create new safety hazards.
Complex Electrical Issues: If troubleshooting points to a more intricate electrical problem beyond simple component replacement (e.g., a short within the chair's internal wiring harness that isn't easily visible, or issues with the main control board), professional diagnosis and repair are highly recommended.
Damaged Frame or Mechanism: If the chair's metal frame or the reclining mechanism itself is bent, broken, or severely damaged, replacing the motor alone will not fix the underlying issue. Attempting to operate a chair with structural damage can be very dangerous. A professional can assess and repair structural damage before installing a new motor.
Under Warranty: If your recliner is still under warranty, attempting DIY repairs will almost certainly void it. Contact the manufacturer or retailer for service under warranty instead.
Heavy or Cumbersome Chairs: Large, heavy recliners, particularly lift chairs, can be extremely challenging and dangerous to maneuver alone. If you cannot safely tip, move, or work on the chair by yourself, call for professional assistance. Your safety is worth the cost.
By prioritizing safety throughout the entire process, you not only protect yourself and your home but also ensure the longevity and proper functioning of your repaired recliner.

-
Feedback
Related products


Hotline:0086-15869193920
Time:0:00 - 24:00
